Common DIY Flooring Mistakes and How to Avoid Them
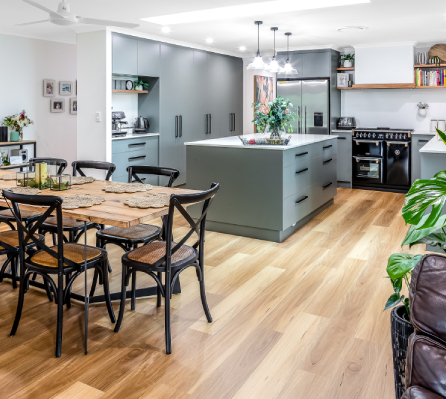
Planning a DIY flooring project can be an exciting way to enhance your home, but it comes with its challenges. Many common mistakes can lead to costly errors and frustration. This guide highlights the pitfalls to avoid, strategies for success, and essential tips for maintaining your floors.
Common DIY Flooring Mistakes to Avoid
Understanding and addressing potential mistakes early can save time, resources, and effort. Here are some key areas to focus on:
Accurate Measurements Matter
Precision is crucial in flooring projects. Inadequate measurements can result in improper fit, wasted materials, and higher costs. Using reliable tools and double-checking measurements ensures your flooring fits seamlessly and minimizes waste.
Subfloor Preparation Is Key
A poorly prepared subfloor can compromise the integrity of your flooring. According to a blog by Flooring America, Flooring isn’t just about looks—it’s also a functional part of our home. The latest trends in flooring offer the perfect combination of style and practicality, ensuring that your floors are not only gorgeous but also durable, sustainable, and easy to maintain. For instance, uneven surfaces or moisture-prone areas like laundry rooms can cause premature wear and tear. Take the time to level, clean, and inspect the subfloor for a stable foundation.
Choosing the Wrong Flooring Type
The right flooring type depends on the specific needs of the room. For example, moisture-prone areas like bathrooms require water-resistant materials, while high-gloss finishes may not be suitable for spaces like home gyms. Assess the functional and aesthetic needs of each space to avoid costly replacements.
Acclimating Materials
Failing to acclimate materials to the room’s environment can lead to expansion, contraction, or warping. Allow materials such as vinyl plank, laminate, or wood to adjust to temperature and humidity levels before installation.
Overlooking Expansion Gaps
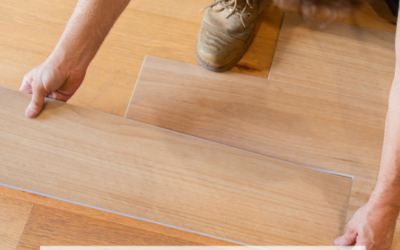
Floating floors like laminate or hybrid flooring require expansion gaps to accommodate natural movement. According to a blog by Floor Center, rushing through measurements or cutting inaccurately can result in an uneven floor or unnecessary waste of flooring. It can also make your finished project look messy and unprofessional. Without these, materials can warp or buckle over time. Plan for a 6-10mm gap around walls and stationary objects to prevent damage (read manufacturing recommendation for your chosen product first).
Strategies for a Successful DIY Flooring Project
Research and Plan
Before starting, research the types of flooring best suited for your space. Consider durability, maintenance requirements, and aesthetics. Understanding installation techniques and gathering the right tools can make the process smoother.
Invest in Quality Tools
Using high-quality tools, such as precise measuring devices and reliable saws, ensures clean cuts and accurate installations. Quality equipment not only simplifies the process but also enhances the overall outcome.
Follow Instructions Closely
Each flooring material comes with specific installation guidelines. Adhering to these instructions helps prevent issues like misalignment or premature wear. Proper techniques ensure a professional finish and long-term durability.
Regular Maintenance
Once installed, maintaining your flooring is essential. Routine cleaning, addressing spills promptly, and using the correct cleaning products help preserve the finish and extend the lifespan of the flooring.
Know When to Seek Professional Help
Some challenges may require professional assistance, especially if the subfloor condition is uncertain or if issues arise during installation. Professionals can provide valuable guidance, ensuring a flawless result.
Tips for Maintaining Your Flooring
Proper maintenance keeps your floors looking great and ensures their longevity. Here are a few tips:
-
Clean Regularly: Use appropriate cleaning tools and solutions for your flooring type to prevent scratches and stains.
-
Address Damage Quickly: Promptly repair scratches, dents, or other issues to prevent further deterioration.
-
Use Rugs and Mats: Place rugs in high-traffic areas and mats at entryways to protect against dirt, moisture, and wear.
-
Adapt to Seasonal Changes: Monitor humidity levels and make adjustments to prevent flooring from expanding or contracting.
Common Flooring-Specific Mistakes
Each flooring type comes with its unique challenges. Avoid these common mistakes for better results:
-
Hardwood Flooring: Skipping acclimation can lead to warping, while failing to leave expansion gaps may result in buckling.
-
Laminate Flooring: Poor subfloor preparation or ignoring underlayment requirements can cause uneven surfaces and noise.
-
Vinyl Flooring: Ensure the subfloor is clean and smooth to avoid bubbling or adhesive failure.
-
Engineered timber: Neglecting regular vacuuming and immediate stain treatment reduces the timber’s lifespan.
DIY Flooring Resources and Tools
Equipping yourself with the right tools and resources is key to success:
-
Essential Tools: Invest in reliable measuring devices, saws, adhesive applicators, and leveling tools.
-
Learning Resources: Utilize online tutorials, instructional videos, and community forums for the advice.
-
Checklists: Create a detailed checklist to track materials, tools, and steps, ensuring no detail is overlooked.
Achieve flawless, long-lasting floors with Homely Flooring! Our expert tips and premium DIY flooring solutions make it easy to plan, install, and perfect your space. Avoid common mistakes and create stunning results that elevate your home’s style and durability. Start your DIY flooring journey with Homely Flooring today!
FAQs
What are the most common DIY flooring mistakes?
The most common DIY flooring mistakes include inaccurate measurements, poor subfloor preparation, choosing the wrong flooring type, neglecting material acclimation, and overlooking expansion gaps. Avoiding these errors ensures a smoother installation and longer-lasting results.
How do I properly prepare a subfloor for flooring installation?
To prepare a subfloor, first, clean the surface thoroughly by removing dirt, dust, and debris. Check for uneven areas and level them using a self-levelling compound. Ensure the subfloor is dry to prevent moisture damage. Proper preparation provides a stable foundation for your flooring.
Why is acclimating flooring materials important before installation?
Acclimating flooring materials allows them to adjust to the room’s temperature and humidity. This step prevents expansion, contraction, warping, and buckling after installation. Most flooring materials should acclimate for 48 to 72 hours in the installation space (read manufacturing guidelines for recommendations).
How much expansion gap should I leave for floating floors?
For floating floors like laminate and hybrid flooring, leave an expansion gap of at least 6mm (1/4 inch) around walls and fixed objects. This space allows the flooring to expand and contract naturally, preventing buckling and damage.
Can I install new flooring over an existing floor?
Yes, you can install new flooring over an existing floor if the surface is level, clean, and in good condition. However, it’s essential to check the manufacturer’s guidelines to ensure compatibility and avoid issues like uneven surfaces or poor adhesion.
What tools do I need for a DIY flooring project?
Essential tools for DIY flooring include a tape measure, utility knife, saw (circular or jigsaw), spacers for expansion gaps, adhesive applicator (if needed), and a level. Investing in quality tools improves precision and simplifies the installation process.
How do I maintain my DIY flooring to make it last longer?
To maintain your DIY flooring, clean it regularly with suitable products for your flooring type. Use mats at entryways to prevent dirt buildup, address spills immediately, and repair minor damage promptly. Regular care helps extend the life and appearance of your floors.
Avoid costly mistakes—start your DIY flooring project right with Homely Flooring’s expert guide!