DIY Vinyl Flooring: The Perfect Solution for Budget-Conscious Homeowners
When it comes to home improvement projects, flooring is often one of the most transformative yet daunting tasks. The idea of tearing up old floors and installing new ones can be intimidating, especially for budget-conscious homeowners. However, do it yourself vinyl flooring presents an excellent solution that combines affordability, ease of installation, and aesthetic appeal.
“Some home improvements, however, are more likely to increase your home’s value than others.” — Melanie Pinola, a Writer from New York
Why Choose Vinyl Flooring?
Vinyl flooring has surged in popularity over the years, and for good reason. In fact, according to the blog, Pros and Cons of Luxury Vinyl Flooring, this type of flooring offers all the natural beauty of hardwood floors, without the maintenance. Here are some compelling reasons why vinyl flooring might be the perfect choice for your home:
Affordability
Vinyl flooring is significantly cheaper than traditional hardwood, stone, or ceramic tiles. This makes it an ideal choice for homeowners who want to refresh their living spaces without breaking the bank. The cost savings are not just in the material but also in the ease of installation, which can often be done without professional help.
“People want variety and something that is affordable.” – Bobby Brown, an American Singer and Rapper
Durability
Vinyl flooring is designed to withstand heavy foot traffic, making it suitable for almost any room in the house, including kitchens. It is resistant to water, stains, and scratches, which ensures it retains its look and functionality for years.
Variety of Designs
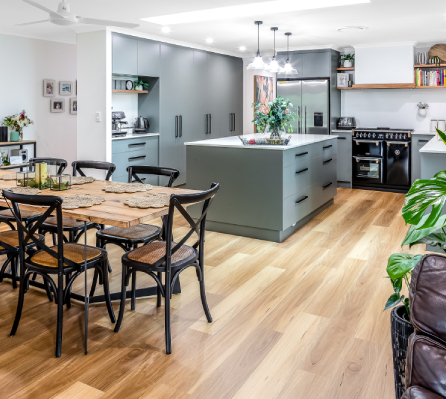
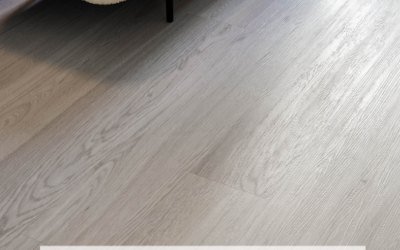
One of the standout features of vinyl flooring is the variety of designs available. Whether you prefer the look of hardwood, stone, or abstract patterns, there is a vinyl option to match your aesthetic. Advanced printing technology has made it possible to mimic the appearance of more expensive materials convincingly.
Comfort
Vinyl floors are softer underfoot compared to harder surfaces like tile or wood. This makes them more comfortable to walk on and reduces the risk of injuries from falls. They also have insulating properties that can help maintain a comfortable temperature in your home.
DIY Vinyl Flooring: Step-by-Step Guide
Installing vinyl flooring yourself can seem daunting, but with the right tools and preparation, it can be a straightforward and rewarding project. Here’s a step-by-step guide to help you through the process.
Step 1: Gather Your Materials
Before you begin, make sure you have all the necessary materials and tools:
- Vinyl flooring sheets or planks
- Adhesive (if not using peel-and-stick vinyl)
- STANLEY® knife
- Measuring tape
- Straight edge or ruler
- Roller (for pressing down the vinyl)
- Cleaning supplies
Step 2: Prepare the Subfloor
A smooth, clean subfloor is crucial for a successful vinyl flooring installation. Remove any old flooring materials, nails, or debris. If there are any uneven areas, use a self-levelling compound to create a flat surface. Clean the subfloor thoroughly to ensure there is no dust or dirt.
Step 3: Measure and Cut the Vinyl
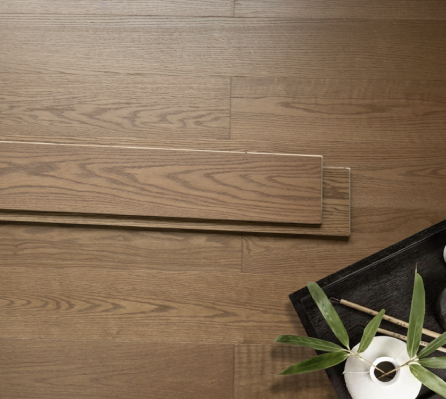
Measure the length and width of the room to determine how much vinyl you will need. Add a few extra inches to your measurements to account for trimming and fitting. Use a STANLEY® knife and straight edge to cut the vinyl to size. If using vinyl planks, stagger the joints for a more natural look.
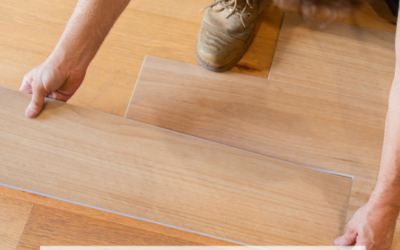
Step 4: Lay the Vinyl
For peel-and-stick vinyl, remove the backing and press the tiles or planks firmly onto the subfloor, starting from the centre of the room and working your way outwards. For sheet vinyl, apply adhesive to the subfloor and carefully lay the vinyl on top, smoothing out any bubbles or wrinkles as you go. Use a roller to press down the vinyl and ensure it adheres properly.
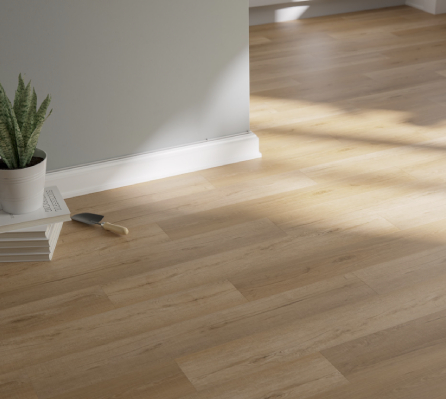
Step 5: Finishing around the perimeter
Use a STANLEY® knife to trim vinyl plank. Cut tight against all fixed objects (kitchens, skirting boards etc).
Maintenance Tips for Vinyl Flooring
To keep your vinyl flooring looking its best, follow these simple maintenance tips:
Regular Cleaning
Sweep or vacuum regularly to remove dirt and debris that can scratch the surface. Mop with a damp cloth and a mild detergent for deeper cleaning.
Avoid Harsh Chemicals
The best solution when it comes to mopping your vinyl flooring, as suggested by a blog by WallHub, is water. But you may use gentle cleaning solutions specifically designed for vinyl flooring. Avoid abrasive cleaners, bleach, or ammonia-based products.
Protect from Heavy Furniture
Use furniture pads or coasters under heavy pieces to prevent dents and scratches. Avoid dragging furniture across the floor.
Address Spills Promptly
Wipe up spills immediately to prevent staining and water damage.
DIY Vinyl Flooring: A Budget-Friendly Home Improvement
DIY vinyl flooring is an excellent option for homeowners who want to achieve a high-end look without the high-end price tag. Its affordability, durability, and ease of installation make it a popular choice for DIY enthusiasts and professionals alike. Whether you are updating a single room or redoing your entire home, vinyl flooring offers a versatile and stylish solution that can suit any design preference.
Taking on a flooring project yourself can be an empowering experience, allowing you to take control of your home’s appearance and functionality. With DIY vinyl flooring, you not only save money but also gain the satisfaction of completing a home improvement project with your own hands. By following the steps outlined above and maintaining your floors properly, you can enjoy beautiful, durable flooring for years to come.
If you’re considering vinyl flooring for your home, be sure to explore the wide range of options available. From wood-look planks to intricate tile patterns, there is a vinyl flooring solution to match any style and budget. Embrace the DIY spirit and transform your living space with vinyl flooring – the perfect solution for budget-conscious homeowners. Get free samples of our selection of vinyl flooring at Homely Flooring and take the first step towards having beautiful flooring for your home.
FAQs
What are the benefits of DIY vinyl flooring?
Do it yourself vinyl flooring offers numerous benefits, including affordability, durability, ease of installation, and a variety of designs. It’s water-resistant, making it ideal for kitchens, and comfortable underfoot, providing a soft surface compared to other flooring options.
How do I prepare my subfloor for vinyl flooring installation?
To prepare your subfloor, remove any existing flooring materials, nails, or debris. Clean the surface thoroughly and use a self-levelling compound to address any uneven areas. A smooth, clean subfloor ensures proper adhesion and a flawless finish for your vinyl flooring.
Can I install vinyl flooring over existing floors?
Yes, vinyl flooring can often be installed over existing floors, such as tile or even hardwood with additional floor preparation. Ensure the existing floor is clean, dry, and in good condition. Any imperfections or uneven areas should be addressed to ensure a smooth installation.
What tools do I need for DIY vinyl flooring installation?
The basic tools you’ll need include a STANLEY® knife, measuring tape, straight edge or ruler, roller, and cleaning supplies. Depending on the type of vinyl flooring, you may also need adhesive and a trowel for spreading it.
How do I maintain and clean vinyl flooring?
Maintaining vinyl flooring is simple. Regularly sweep or vacuum to remove dirt and debris. Mop with a damp cloth and a mild detergent for deeper cleaning. Avoid using harsh chemicals, abrasive cleaners, or excessive water to prevent damage.
How do I cut vinyl flooring to fit around obstacles?
To cut vinyl flooring around obstacles, measure and mark the area where the cut is needed. Use a STANLEY® knife and a straight edge to make precise cuts. For complex shapes, create a template with paper or cardboard first, then trace it onto the vinyl for accurate cutting.
Is DIY vinyl flooring a good option for high-traffic areas?
Yes, vinyl flooring is highly durable and suitable for high-traffic areas. It is resistant to scratches, stains, and water, making it an excellent choice for busy households and commercial spaces.
Can I install DIY vinyl flooring myself, or should I hire a professional?
DIY vinyl flooring is designed for easy installation, making it a great project for homeowners. With proper preparation and the right tools, you can achieve professional-looking results. However, if you’re unsure or dealing with complex areas, consulting a professional can ensure the best outcome.
Start your DIY project with great savings! Visit our showroom and explore our wide variety of flooring options at Homely Flooring to make your budget home renovation happen.